

After visiting the Smithsonian National Museum of Natural History and seeing the case with minerals that emit radiation, getting a geiger counter seemed like a good tool to have. So after studying various models I bought a Monitor 4 kit from GiegerCounters.com. After receiving the kit and reading the through assembly instructions, I took the time to gather my tools. Having never worked with a Geiger-Müller tube before I was apprehensive toward handling it to the point of considering using latex gloves. After seeing the tube casing, it seemed okay to handle [make sure no contact with the mica window].


Next the output connector is soldered on and the speaker.
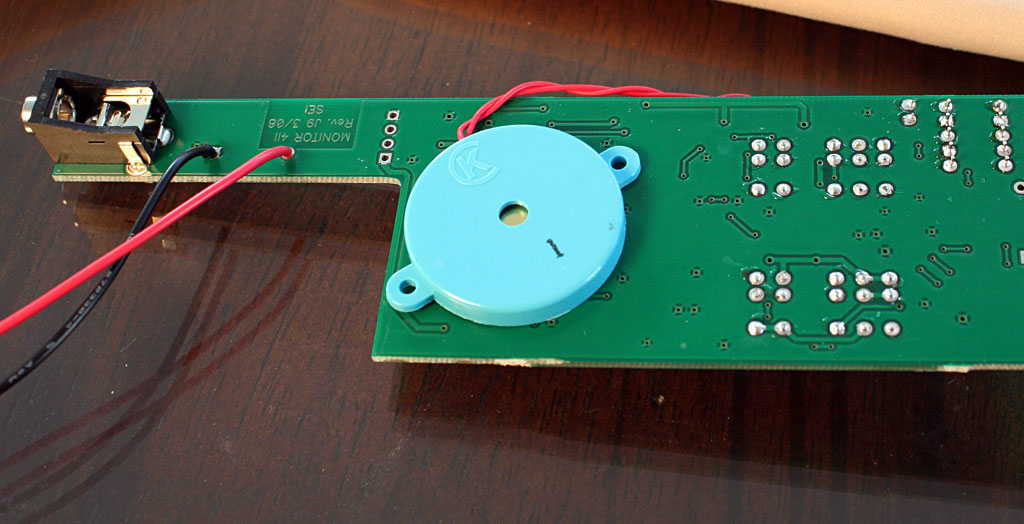

A diode to mount the meter to is installed along with a a foam piece for circuit board support.


Here is a close up of the Geiger-Müller tube probably made in Tennessee. I did not take pictures of this assemble step because I was concentrating on not breaking this tube.

After testing the circuit board, the tube, speaker, and battery clip are placed in the bottom half of the case. The top half then fits over that to complete the case. Five screws lock it all together. I still have to put conformal liquid on part of the circuit board to seal the high-voltage components from moisture. Also once I have my digital meters calibrated I will make some adjustments to the detector.

Fortunately, I found no common items around the house that generate radiation (checked the smoke detectors, granite rock, New Albany shale, potassium chloride salt substitute).
The detector has two sets of switches. Switch 1 has an off, on, on with speaker, and battery test setting. Switch 2 has a 1x, 10x, and 100x setting. So the analog meter can display 0-50000 CPM. The user outputs are a little red LED, an analog meter, and a speaker.

Later, I checked the detector on a Meta-autunite specimen that generated about 300 CPM. It was good to see it working!

Setting the detector to 100x it measured about 8000 CPM on a Torbernite mineral specimen.

All and all, an interesting experience assembling and testing the Monitor 4. I believe the tool will be useful in finding Uraninite specimens.
Learn more about Geiger Counters with Professor Bob Burk (Carleton University - Ottawa, Canada) from this YouTube video:
4 comments:
I found it surprising that you got no readings from the granite or KCl. Is this simply a function of the sensitivity of the instrument? What exactly is the instrument reading? Should it read all sorts of radiation, including gamma rays? (I've never used a geiger counter, so I don't know--just curious). In the oil and gas industry, we use gamma ray detectors for logging borehole formations. These show high readings when drilling through shale, granites, or other potassium-rich rocks, so I would have expected a geiger counter to do the same.
Interesting post; I didn't know you could build your own geiger-counter! Are they expensive?
--Howard
Before I answer your questions, let just say I am not an expert in nuclear sciences or analog electronics. Without having a calibrated Geiger counter to compare the one I have to I am not sure if the my KCl or granite samples are emitting much radiation to measure. This web page documents household items that might be radioactive.
The Geiger tube is detecting atomic particles which ionize the gas in the tube. This ionization creates electric current in the tube that can be detected. The Monitor 4 device detects alpha particles (down to 2.5 MeV), beta particles (50 keV-35% efficiency; 150 keV-75% efficiency), gamma & x-rays (down to 10 keV through mica window; 40 keV through sidewall).
Once you have a Geiger-Müller tube you just need to build a high-voltage power supply and pulse detection circuit.
Modern American detectors are somewhat pricey but Russian detectors on eBay can be bought for under $100 (see this blog entry to learn more). One can also find cheaper American detectors from Cold War times on eBay as well.
That is a LNDinc tube made in NY ( http://www.lndinc.com/products/711/ )
Oh and get that thing calibrated at a lab with some NIST sources, I work at one and meters can be so far off that it is astounding that people are using them. Without a good cal you could be reading double or half or 12x time the actual. It's not that expensive just 60ish bucks at the lab I work in, takes a couple of weeks.
If you want to play around with how much your readings can change play around with those three pointometers each one will correspond to a range. Go ahead a twist away your meter is not calibrated anyway and you'll see how much you can and cannot measure.
Thanks for the comment. It is neat the tube is made in New York. I now have an oscilloscope now and can get a frequency generator so I might try to calibrate this device.
Post a Comment